A place to chronicle our motorsport activities and company projects.

Latest

Recaro Upgrade in the TTS

The stock seats in the TTS are really nice for an OEM offering however, for our intentions they are a bit on the heavy side and lack any substantial lateral support (side bolstering).

There are countless options available for aftermarket seats, and we looked into many of them, however, we were continually brough back to Recaro, not only for their long standing and ongoing cooperative relationship with VW and Audi both as an OEM supplier and in various motorsport endeavours, but also due to both the aesthetic and visceral appeal of their seat designs.

Our main considerations were light weight, and a seat that was motorsport inspired while still being comfortable for a daily driver. The Sportster CS checked all the boxes. This seat is actually offered as an option on many OEM applications like the Ford Focus RS and many other European spec models.

We contacted Recaro and quickly had a pair of seats and rails/sliders on the way to us in a black leather/alcantara color combination that perfectly matched the trim of the TTS interior.

The seats arrived, and we wasted no time in opening them up and getting them installed into the car.

Figuring out how to assemble the rails/sliders was the hardest part of the install. The brackets that secure everything to the car are application specific, however, the rails/sliders are universal, as is the hardware supplied with them. In fact, supplied with the installation hardware is enough bolts to cover 3 different types of seat mounting configurations.

Replacing the stock seats with the Sportster CS’s saved us a total of 41 lbs from the interior. The driver’s side seat saved 20 lbs over the stock unit. The passenger side seat saved us 21 lbs due to the extra air bladder and sensor components in the OEM seat used to trigger the passenger side airbag. With that said, the underside of the Recaro’s have the available mounting provisions to swap over the air bladder, sensors, and wiring harness of the OEM seats if you wish to retain the mechanism to trigger the passenger airbag.

The very top of the headrest comes pretty close to the back of the headliner with the seat rail adjusted all the way back, but you would need to be quite tall for this to pose any real issues. There is also a back rest angle knob on the outboard side of each seat for further adjustment.

Not that anyone will really fit into the back seat of an Audi TT, but the Sportster CS has an integrated handle to flip the backrest forward for easy access to the back seat, which would indeed be useful were there more space in the back of the car.

The seats are incredibly comfortable and very nicely bolstered as well. It is not so aggressive as to make them difficult to get into or out of, but just enough to hold you in place quite firmly when cornering the car hard. This color combination matches the TTS interior nearly perfectly save for the stitching, but that’s quickly forgotten as soon as you slide your butt into them.

Because the back seats are basically useless, and because we intend to track the car, we figured we may as well remove the back seat while we were working on the interior as well. This was not exactly simple, and required 3 people to accomplish, however, the weight savings are well worth it. The entire rear seat assembly weighs 36 lbs, and this was immediately noticeable in the driving dynamics of the car once removed. We plan to find some carpeting to make a cover for the fuel tank access panels, but just haven’t yet had the time.

So just on the interior alone, we’ve saved a total of 77 lbs of weight.

We would like to extend a huge thank you to Recaro US for their help and support on this project. They were incredibly enthusiastic and helpful in answering all of our questions. For anyone that is looking to take their car to the next step, this is the way to do it, and we can’t recommend these seats highly enough. They compliment the TTS perfectly and sacrifice absolutely nothing, except for the side airbags.

TTS Goes Low

With the car still in the air on the lift from the previous upgrades, it was time to tackle the suspension.

We knew that virtually all MK5 VW platform based applications utilized effectively the same suspension setups, so there we ample options available to us. With that said, however, we have become friendly with Eibach Springs UK due to having worked cooperatively with them on some other projects, and we were keen to work with them again, so they were tremendously gracious enough to provide us with their Pro-Kit coilover suspension system for this project.

The system includes full replacement front struts with threaded bodies to allow for height adjustment of the spring perches, and new rear shocks as well as adjustable perches for the rear springs. Partially to help facilitate easier installation, and to determine how low the setup would actually allow the car to sit, we adjusted all components to their lowest possible settings prior to installation.

***Yes, this upgrade will result in bypassing the OEM electronically adjustable shocks equipped on the TTS from the factory. A suspension fault warning light will appear on the dash, but is easily disabled with a resistor that matches the electronic resistance valve of the OEM shocks. This is not included.

As we are also concerned with saving as much weight as possible with this project, we made certain to compare the weights of every component being replaced and/or removed.

The total weight savings from swapping the OEM suspension for the Eibach Pro-Kit coilovers amounted to 8.5 lbs.

The front strut and spring assemblies were exactly 2 lbs lighter per side. The OEM’s weighed in at 14 lbs each and the Eibach assemblies weighed in at 12 lbs. Since the upper spring perches were being reused, there was no need to weigh them.

Surprisingly, the Eibach rear shocks were marginally lighter than their OEM counterparts as well. The OEM units weighed in at 6 lbs each, while the Eibach units weighed 4.5 lbs each. Again, the rear upper mounts were reused.

The OEM rear springs, the rubber perches, and the electronic cap for the adjustable rear shocks weighed in at 4.25 lbs, while the Eibach rear springs and perches weighed in at 3.5 lbs.

With all of the parts weighed, we proceeded with the install, which was pretty straight forward for a transverse engined VW/Audi application. There were no surprises really. As mentioned above, installation is made easier by adjusting each spring perch to its lowest setting prior to install, which reduces the overall height of the parts and enables easier fitment of the front upper mounts and easier fitment of the rear springs.

We lowered the car back down onto the ground, and this is exactly how it sat. While there was undoubtedly a little settling left to occur, the rear visually appears slightly lower than the front, however, the body is actually perfectly level to the ground. The alignment was clearly thrown off by the dramatic lowering as evidenced by the tremendous amount of screeching from the front tires as they scrubbed along the shop floor when moving the car, so that was remedied the very next day by a complete alignment and corner balancing at a local shop, Performance Race Solutions.

While this resulted in a more visually balanced ride height with the rear raised up slightly, more importantly, significantly improved handling and vehicle dynamics resulted. Turn in response was drastically improved, and any understeering experienced previous was nearly completely eliminated. The car became much more predictable when cornering, and could be induced to slide with little effort, thanks in no small part to the Haldex controller set to Race mode as well. :thumbsup:

For anyone that will be using their car on a track of any kind, a proper corner balancing is a must.

Many thanks are owed to Eibach Springs UK for their generous support of our project, and we genuinely cannot speak highly enough of the result of this upgrade. The car handles incredibly well with absolutely no compromise of the ride quality in any way.

A little more rear wheel bias

We’ve been incredibly busy recently, so admittedly, we’re a little behind on the TTS project updates. For those of you who may be following along on our Facebook page, the car is transforming rather quickly, but I will still continue to do regular forum updates covering each individual modification in depth as soon as I have the available time.

Following the the Neuspeed rear sway bar and torque arm insert installation a couple weeks ago, we immediately moved on to the rear Haldex Gen. 4 controller and wireless remote switch. Both of these parts were also sourced from our friends over at North American Motorsports. They have been a great asset to us on this project.

http://www.namotorsports.net/detail.cfm/part_cd/HA.HALDEX04PQ35
http://www.namotorsports.net/detail.cfm/part_cd/HAHaldexRemote

The new Haldex control unit is intended to dramatically change the driving dynamics of the vehicle by transfering more power to the rear wheels when needed. There are 3 settings which are selected with the optional switch or the wireless remote in our case.

Eco, Sport, and Race modes

Eco Mode – Intended for increased fuel efficiency for highway driving where AWD stability is not a high priority.
Sport Mode – Intended for more aggressive driving situations where more AWD stability is needed.
Race Mode – Intended for highly aggressive or track driving where AWD control is paramount, sending the highest possible power to the rear wheels.

Here is a graph highlighting the torque splits between the front and rear wheels in each of the different modes. Notice the progressively increased amount of torque sent to the rear wheels in Sport and Race modes compared to Eco moce. (Substitute “Eco” mode for “Stock” on the graph.)

Here is a link to more technical data: http://www.hpamotorsport.com/haldex.htm

Since the TTS will be primarily a track vehicle for us, we have it set to Race mode for the time being, however, the car will remain fully streetable as well, so having the option to select Sport and Eco modes are indeed beneficial.

If we’re honest, however, we’re secretly just hoping to get a little sideways in the corners!

Installation is pretty simple. You simply unbolt the OEM unit from the transfer case and unclip the wiring connector. You will be left with a hole in the transfer case to which you will insert the new control unit. A small amount of diff. fluid will seep out, but it’s very minimal.

If we weren’t going to use the switch or wireless remote, you would simply plug the OEM harness into the new unit and install it, however, to utilize the switchability of the wireless remote, we need to splice in the wireless signal transponder. This is incredibly simply as the unit is supplied with the correct pigtail harness to make installation plug and play. Fully detailed instructions are included.

With the transponder harness plugged in, we simply bolt up the new Haldex controller.

With the unit bolted in place, we now need to run the transponder harness into the cabin through a hole in the body. We found a rubber grommet near the subframe that was perfect in location and size, so we cut a hole in it through which to pass the harness.

Lastly, we plug in the transponder and mount it out of the way behind some of the interior trim panels within the trunk. Now we can use the remote to select the performance mode for any given driving situation.

More updates soon!

Stiffening things up

So we recently pulled the TTS into the shop to get started on its overhaul. It will pretty much be off the road for the next couple of weeks while we change out as much as we possibly can.

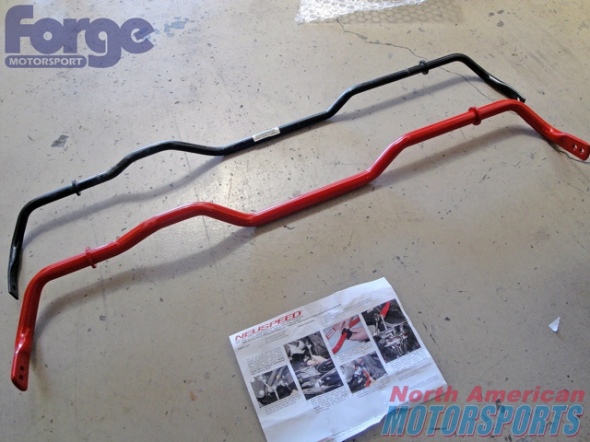
Two of the first things we upgraded were rather small individual parts, but when combined with everything else we have planned, will make for a thoroughly complete upgrade package. They were easy to get done in a matter of a few minutes within getting the car up on the lift. Both of these items happen to be from Neuspeed; their 2009+ Torque Arm Insert, and their 25mm Adjustable Rear Sway Bar.

These two items were provided courtesy of our good friends over at North American Motorsports. We highly recommend that you guys check them out for anything that you may need.

http://www.namotorsports.net/detail.cfm/part_cd/NS22.10.68
http://www.namotorsports.net/detail.cfm/part_cd/NS25.02.25.4

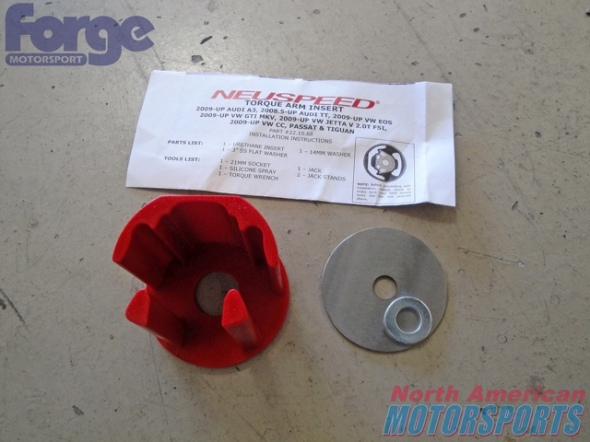
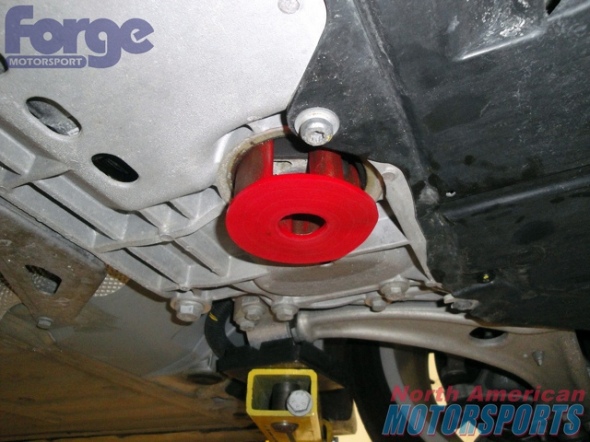
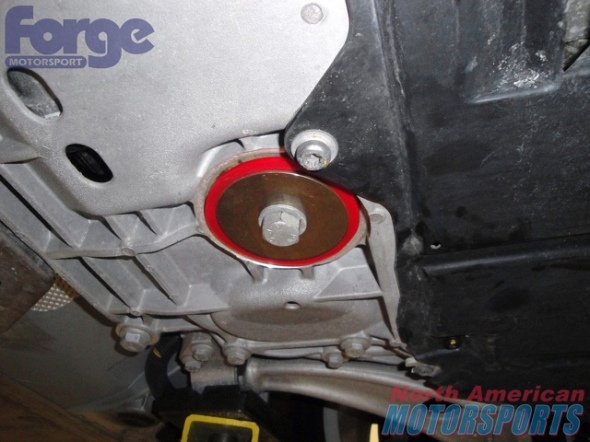
First up is the torque arm insert. Most of you will be familiar with how this product works. It’s simply a urethane bushing that inserts into the open spaces of the rubber bushing for the lower pendulum mount. By doing so, it limits the movement of the motor under load, and helps better transfer the power to the wheels.

Installation is simple. You just remove the single 21mm bolt from the bushing, apply some grease to the insert to help slide it into place, and then reinstall the bolt using the new washers to help secure the insert in place.

20110426-073947.jpg

20110426-074707.jpg

20110426-074842.jpg

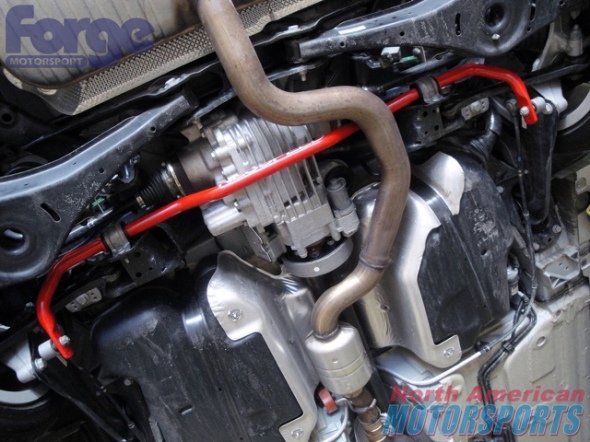
Next up is the rear sway bar. This piece, which is 25mm in diameter, is a substantial upgrade over the factory 18mm rear bar, which will dramatically help to reduce understeer and make the handling much more neutral.

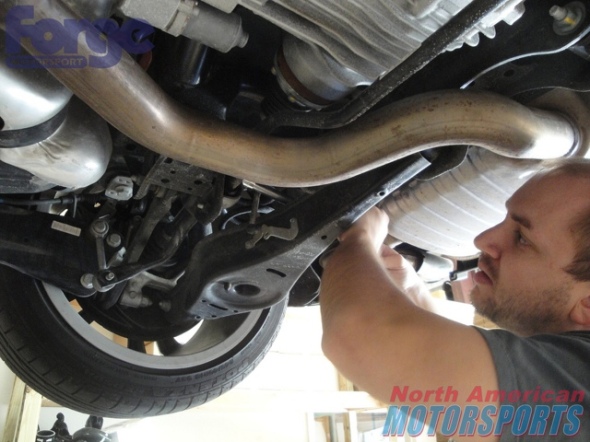
Installation of this was also quite simple. Essentially just remove and replace, and we didn’t have to remove the exhaust or anything else to make room for the bar. It’s very easy to work around every other installed component. The most difficult part was actually removing the metal clamps from around the OEM bushings to swap them over to the new Neuspeed bushings.

20110426-074229.jpg</

20110426-074234.jpg</

20110426-074241.jpg</

We are working with some of the best names in the industry on this project, and we continue to add new companies to that list at every turn. We have already started installing numeorus other upgrades as well, and we will be posting more updates about all of it very soon, so stay tuned.

Our Trailer Gets an Upgrade

In August 2010, we purchased a brand new, custom made, 32′ car hauler trailer to more easily transport at least one of our show vehicles as well as all of our displays, tents, and product to the various enthusiast events we attend throughout the year.

From the onset, we full intended to do a full wrap job on the trailer, which is why we had it custom built with the smooth exterior panels, however, being a little pressed for time leading up to the H2O International event (www.h2ointernational.com) in September, we just put a simple rendition of our logo on the sides in blue vinyl and our contact details on the back in black. Nothing to write home about, but it got the job done. Our good buddy Drew happens to have a vinyl plotter, so we bought the material and he cut it and helped us apply it.

After the remainder of the 2010 show season, we set to work on designing a more comprehensive wrap theme for the trailer. We all put our heads together and discussed some of the elements we wanted in the design. We had a lot of ideas, but eventually narrowed things down and came up with a design. Our web developer pals over in the UK at Maximum Designs (www.maximumdesigns.co.uk) helped us turn it into a reality.

Below are some images of the finished product. The door side, which is still in progress in these pics, features just the single vehicle featured with the same shield/crest design and text.

Be sure to be on the look out for us traveling to and from various events this show season.

The answer?

A 2009 Audi TT-S Prestige Package in Ice Silver Metallic

The car is prectically brand new, with only 5000 miles on the odometer. It was supposedly previously owned by an Audi af America executive too, so we trust that it was likely very well taken care of.

The car is located in upstate New York, and we actually fly out today to pick it up and drive it back home to Orlando.

We’ve brought our computer with us to do some baseline data logging on the drive back home to help us get a better understanding for the performance of the car in stock form before we start to modify it. We will also be getting the ECU and Transmission codes so as to send them off to our partners at Revo Technik so that they can ready the software files for us.

More pictures and updates when the car is back safe in Orlando.

New project car teaser!

Any guesses as to what our new company car is?

Very soon, we will be updating this blog regularly with the acquisition and progress of our latest company project car.

Stay tuned for updates!